
If you’re looking to dive into the fascinating world of beekeeping, understanding the bee colony box is essential. This innovative structure serves as a home for your bees, providing them with safety and space to thrive. Whether you’re a seasoned beekeeper or just starting out, choosing the right colony box can significantly impact your hive's health and productivity.
Understanding Bee Colony Boxes
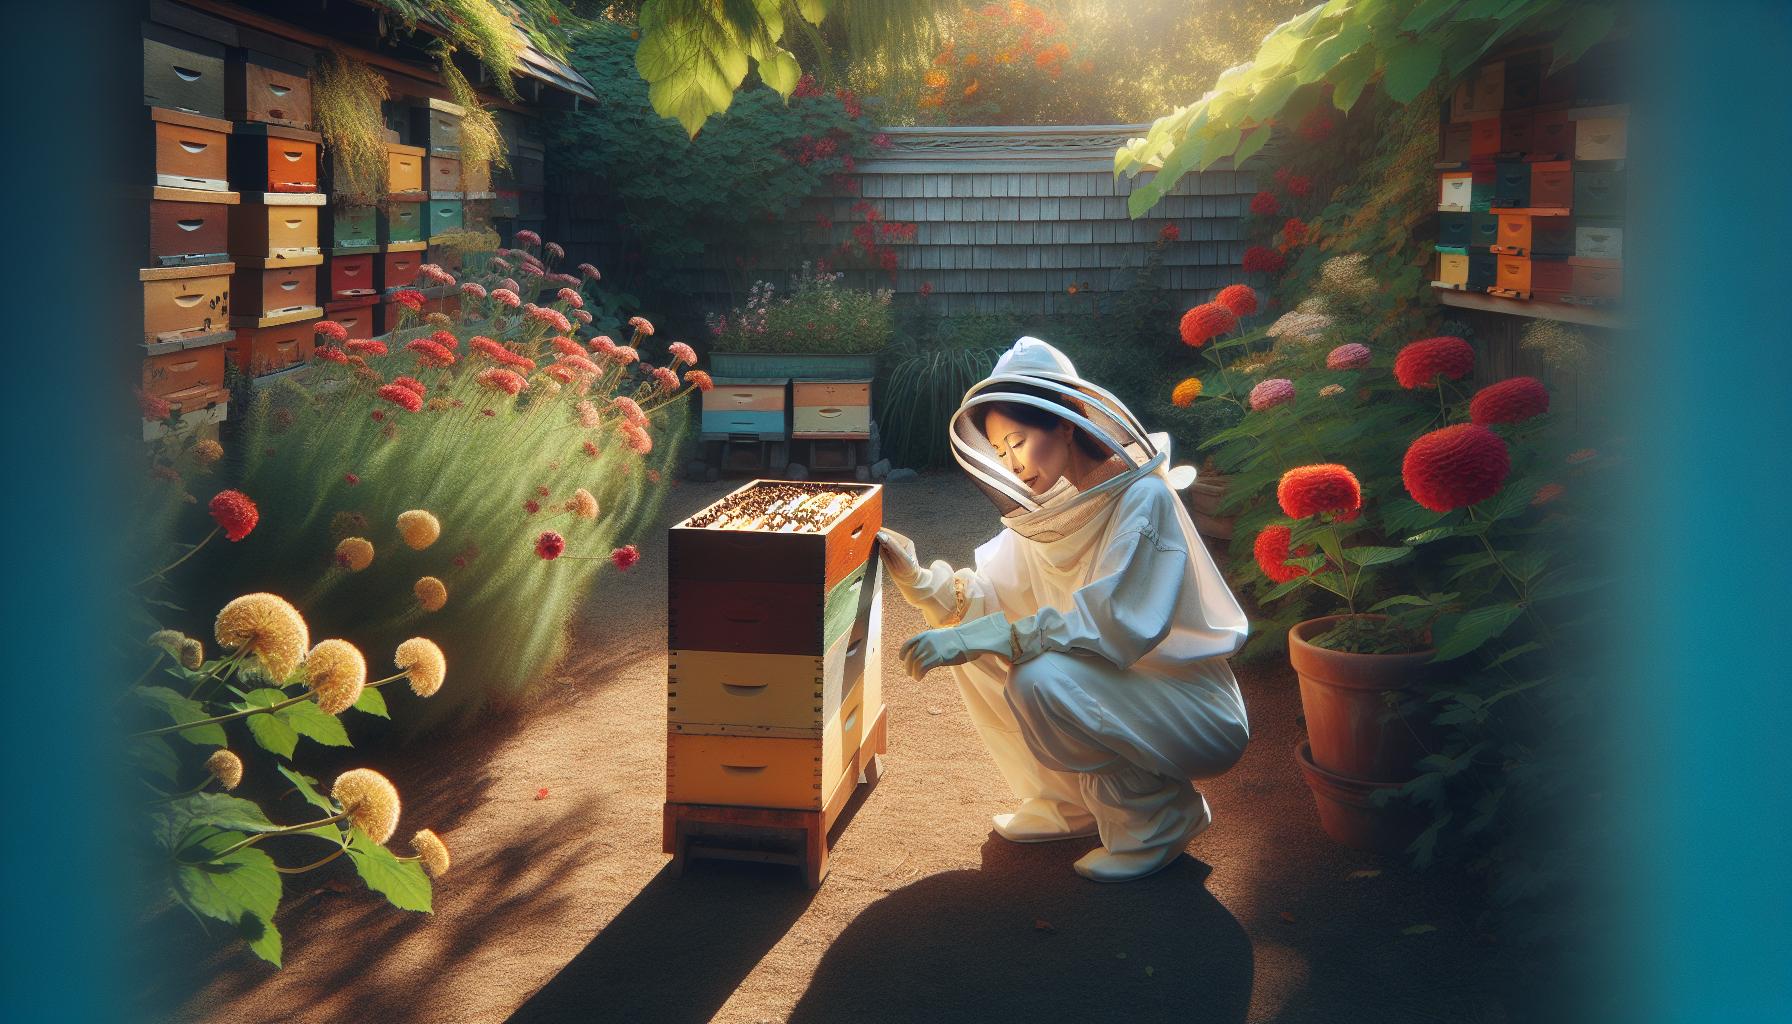
Bee colony boxes serve as vital structures in beekeeping, offering bees a safe environment to thrive. Selecting the right box impacts hive health and productivity.
What Is a Bee Colony Box?
A bee colony box is a manufactured structure that houses a bee colony. The box provides bees with shelter and space for essential activities like storing honey and raising brood. Commonly made from wood, these boxes come in various sizes and designs to meet different beekeeping needs. Proper ventilation and insulation within the box protect against temperature changes, which is crucial for colony survival.
Types of Bee Colony Boxes
The primary types of bee hive colony boxes include:
-
Langstroth Hives: Most commonly used, featuring removable frames that allow for easy inspection and management.
-
Top Bar Hives: Designed for natural beekeeping, this type uses bars instead of frames, allowing bees to build their comb freely.
-
Warre Hives: Vertical hives that emphasize minimal intervention, where bees build upwards as they produce honey.
Each type caters to specific beekeeping methods and preferences, making it essential to choose one that aligns with your approach.
Benefits of Using a Bee Colony Box
Using a bee colony box provides several advantages:
-
Beekeeper Access: Removable frames make hive inspections straightforward, allowing for monitoring of bee health and honey reserves.
-
Colonial Safety: Boxes protect colonies from predators and environmental elements, offering bees a secure space to thrive.
-
Enhanced Honey Production: The structured space promotes efficient honey storage, increasing overall yield.
Selecting the appropriate bee colony box confirms an environment conducive to the well-being of your bees.
Materials Needed
Gathering the right materials plays a vital role in setting up an effective bee colony box. Focus on both essential and optional components to ensure a productive environment for your bees.
List of Essential Materials
-
Bee Colony Box: A basic structure to house the bees. Options include Langstroth hives, Top Bar hives, and Warre hives.
-
Frames: Wooden frames hold foundation sheets where bees build comb for brood and honey storage.
-
Foundation Sheets: Wax or plastic sheets guide bees in comb building, ensuring proper hive structure.
-
Entrance Reducer: Controls the entrance size, helping protect the colony from predators and limiting drafts.
-
Queen Excluder: A barrier that prevents the queen from laying eggs in honey supers, ensuring honey remains uncontaminated.
-
Hive Tool: A multipurpose tool for opening hives and prying apart frames, facilitating colony inspections.
-
Smoker: Generates smoke to calm bees during inspections, reducing aggressive behaviors.
-
Bee Brush: Gently removes bees from frames or equipment without harm, allowing for smooth handling.
Optional Materials for Enhanced Features
-
Bee Feeder: Provides supplementary food, especially important during nectar dearths or for new colonies.
-
Hive Stand: Keeps the colony elevated, improving ventilation and reducing moisture accumulation at the base.
-
Observation Window: Offers a view inside the hive without disruption, aiding in monitoring the colony's health.
-
Thermal Insulation: Enhances temperature regulation during extreme weather conditions, promoting hive stability.
-
Hive Scale: Measures the weight of the hive, assisting in tracking honey production and colony health.
-
Pest Management Products: Options such as essential oils or traps help manage varroa mites and other pests, ensuring colony longevity.
-
Beekeeping Suit: Protective clothing keeps you safe during hive inspections, minimizing sting risks.
Tools Required
Setting up and maintaining a bee colony box requires specific tools to ensure the process runs smoothly. Below are essential tools categorized for assembly and maintenance.
Basic Tools for Assembly
-
Screwdriver: Use a screwdriver to fasten pieces of wood securely when constructing or repairing the bee colony box.
-
Drill: A power drill aids in creating holes for screws and facilitating quick assembly of the box components.
-
Wood Glue: Apply wood glue to joints for additional strength and to prevent leaks that could harm the bees.
-
Measuring Tape: Essential for accurately measuring wood pieces to fit dimensions, ensuring a secure build.
-
Hacksaw: Utilize a hacksaw to cut wood to the required lengths, particularly if customizing the size of the box.
-
Sandpaper: Sand the edges of the wood to ensure a smooth finish and prevent any injuries to the bees.
-
Clamps: Use clamps to hold pieces together while glue or nails dry to ensure proper adhesion.
Basic assembly tools allow for the precise construction of the bee colony box, crucial for providing a safe and efficient environment for the bees.
Recommended Tools for Maintenance
-
Hive Tool: Equip yourself with a hive tool for prying apart frames and scraping off propolis or wax build-up.
-
Smoker: A smoker calms bees during inspections and helps maintain safety by reducing aggressive behavior.
-
Bee Brush: Use a bee brush to gently move bees off the frames without harming them during inspections or honey harvesting.
-
Funnel: A funnel is handy for pouring sugar water or syrup efficiently into feeders without spillage.
-
Protective Gear: Invest in a beekeeping suit or gloves to provide safety against bee stings while performing maintenance tasks.
-
Pest Management Products: Consider products like essential oils or traps to control pests and maintain hive health effectively.
-
Thermal Insulation: Use insulation materials during winter months to regulate hive temperature and protect bees from cold.
Recommended maintenance tools enhance the overall health of the bee colony, facilitating better management and productivity within the hive.
How to Assemble a Bee Colony Box
Assembling a bee colony box requires careful attention to detail and proper tools. Follow these steps for a successful setup.
Step 1: Preparing the Materials
Gather all essential materials before starting. You will need the bee colony box components, frames, and foundation sheets. Ensure you have an entrance reducer, queen excluder, and necessary tools such as a screwdriver and drill. Check that everything is clean and in good condition to promote bee health. Review the assembly instructions that come with your specific box type. If possible, refer to additional resources that outline best practices for assembly.
Step 2: Constructing the Box
Start by laying out the parts of the box according to the instructions. Use wood glue to secure joints before using screws for added strength. Follow the recommended layout method to ensure a sturdy build. Make sure that each side is aligned properly; misalignment can create gaps that may affect insulation. After assembling the outer frames, transport the box to the desired location, avoiding damp areas that can attract pests. If necessary, add a base or stand to keep the box off the ground and promote airflow.
Step 3: Adding Frames and Foundation
Insert frames into the box once it is fully constructed. Each frame should fit snugly within its slot. Attach foundation sheets to these frames; they provide a surface for the bees to build honeycomb. Ensure the foundation is centered and secure in each frame. This step is crucial as it influences how efficiently bees will use the space for honey storage and brood rearing. Check that all frames are evenly spaced to allow bees easy access.
Step 4: Installing the Entrance
Install the entrance reducer in the front of the colony box. This component controls the size of the entrance, aiding in protection against pests and regulating airflow. Align the reducer properly so that bees can easily enter and exit. If applicable, check that the queen excluder is in place above the entrance. Ensure that the structure is stable and securely fastened to prevent any openings that could jeopardize the colony's safety. Regularly check this area to ensure it remains functional as the season changes.
How to Set Up the Bee Colony Box
Setting up the bee colony box involves careful steps to ensure a conducive environment for the bees. Follow these steps for optimal setup.
Step 1: Location Selection
Choose a location that offers sun exposure for most of the day and protection from strong winds. Seek a spot away from heavy foot traffic and predators. Ensure nearby sources of water and flowering plants are accessible for foraging. Avoid placing the box under overhanging branches which might fall during storms. Make sure the box is on level ground to prevent tipping, which can disturb the bees. Evaluate the surrounding area for potential hazards like pesticides or harmful chemicals that could affect the bees' health.
Step 2: Positioning the Box
Place the bee colony box at least eight inches off the ground on a sturdy hive stand. Ensure the entrance faces south or east to capture morning sun, helping to warm the bees early in the day. Position the box away from barriers that could obstruct movement and airflow. Align the entrance with nearby forage to ease bees' access to their food sources. Angle the box slightly to allow rain runoff, keeping the interior dry. Maintain sufficient space around the box to facilitate inspections and management tasks.
Step 3: Introducing Bees to the Box
Introduce bees to the bee colony box during warm daylight hours. Open the package and gently shake the bees into the box, ensuring they fall onto the frames. Leave the queen's cage inside for a few days for the bees to accept her. Verify the entrance reducer is in place to make it easier for the newly installed bees to defend their colony. Avoid disturbing the box for at least a week to allow the bees to settle in. Check back after one week to assess their activity and ensure the queen has been released.
Maintenance and Care
Maintaining and caring for a bee colony box plays a crucial role in ensuring the health and productivity of the hive. Regular attention prevents issues and promotes a thriving bee population.
Regular Inspections
Conduct regular inspections of your bee colony box every 7 to 14 days during the active season. Check for signs of a healthy queen, such as brood patterns and newly laid eggs. Ensure that frames remain spaced correctly and free from overcrowding. Inspect for pests like varroa mites and small hive beetles. Monitor food storage levels and assess honey production as well. Use smoke to calm bees before opening the box, and wear protective gear to ensure safety.
Focus on noting any changes in behavior or population size, as these can indicate potential issues. Use a notebook to record observations for future reference. Regular inspections foster early detection of problems, helping maintain the overall wellness of the hive.
Feeding the Bees
Feed your bees when nectar sources are scarce, especially in early spring and late fall. Use a 1:1 sugar syrup mixture for stimulating brood production during spring months. During fall, opt for a 2:1 sugar syrup to prepare the bees for winter. Place a feeder on top of the nest box, ensuring it does not disturb the bees. Use a hive top feeder or entrance feeder, both promoting easy access to food.
Observe feeding patterns and adjust sugar syrup quantities based on consumption. Ensure fresh syrup is available, replacing any fermented or spoiled mixture. Proper feeding supports healthy bees and adequate honey production, particularly in challenging weather conditions.
Managing Pests and Diseases
Manage pests and diseases effectively to maintain hive health. Start by regularly inspecting for common issues such as varroa mites, wax moths, and nosema. Apply integrated pest management practices, involving both chemical and non-chemical methods. Use sticky traps to monitor mite levels, ensuring that treatments are timely and appropriate.
Apply essential oil treatments or powders as natural alternatives when treating for pests. Always follow label directions carefully. Keep the hive clean by removing dead bees and debris promptly. Perform hive checks regularly to identify signs of disease early, allowing for swift action and recovery. Healthy bees contribute to smoother hive management and more productive honey results.
Troubleshooting Common Issues
Common issues can occur in maintaining a bee colony box. Addressing these challenges promptly supports the health and productivity of your bees.
Problem: Bees Not Thriving
When bees are not thriving, several factors influence their well-being. Inspect the bee colony box for signs of adequate ventilation and proper space. Ensure that the box is not overcrowded. Poor ventilation can cause stress and lead to low bee activity. Check food stores. Bees require sufficient food supplies, especially during cold months or nectar shortages. If food levels are low, offer a sugar syrup mix as an alternative. Monitor external conditions too. Pesticide exposure and extreme weather negatively affect bee health. Implement appropriate measures, including using organic methods for pest control and ensuring a safe location for the box. Maintain a clean environment inside the box, as dirt and contaminants can harm the colony.
Problem: Queen Issues
Queen issues can lead to diminished colony health. Confirm the presence of a healthy queen by checking for egg-laying activity. A weak or failing queen leads to reduced brood production. If no eggs appear, assess the queen's condition. Consider replacing her if she shows signs of illness or inactivity. Introduce a new queen when necessary to restore hive productivity. Observe the worker bees' behavior as well; they may behave differently when the queen is not performing well. Maintain a consistent check on queen cells, as they indicate potential swarming. Proper management of the queen can facilitate a thriving and balanced colony.
Problem: Inadequate Honey Production
Inadequate honey production results from multiple factors. Assess the colony's population size; insufficient worker bees limits honey gathering. Throughout the nectar flow season, monitor for available forage sources nearby. If flowers are sparse, consider relocating the hive to a more resource-rich environment. Review your hive management practices. Ensuring proper spacing and ventilation in the box promotes better honey production. Control pests effectively, as pests can detract from the bees’ ability to collect nectar. Lastly, provide adequate food stores, as well-fed bees contribute to higher honey yields. Be proactive in adjusting the hive location and conditions to enhance honey production.
Helpful Tips for Successful Beekeeping
Choosing the Right Location
Choosing a suitable location for your bee colony box influences the overall health of the bees. Select a spot with at least six to eight hours of sunlight daily. Bright sun promotes warmth and encourages foraging activity. Protect the hive from strong winds using natural barriers like trees or fences. Place the box near a water source such as a pond or birdbath, ensuring bees have easy access to hydration. Position the entrance facing south or east to capture morning sunlight. Elevate the box on a sturdy hive stand to prevent moisture accumulation and facilitate air circulation. Provide ample space around the hive for easy access during inspections and maintenance.
Seasonal Considerations
Seasonal changes significantly affect bee behavior and colony needs. Spring marks a period of increased activity; prepare for hive expansion during this time. Monitor food stores closely, as nectar sources become plentiful. In summer, provide shade to prevent overheating and maintain optimal humidity levels. Check for signs of swarming and manage space accordingly to prevent overcrowding. Autumn focuses on feeding bees to build honey stores for winter. Use sugar syrup mixtures as necessary to sustain the colony. Winter requires proper insulation; ensure the box is sealed against drafts but retains ventilation. Regularly inspect the hive during warmer winter months to assess bee health and vitality. Each season requires specific actions to support the colony's well-being and productivity.
Conclusion
Investing in the right bee colony box is essential for your beekeeping success. By providing a safe and suitable environment for your bees, you can enhance their health and productivity. Remember to choose materials and tools that suit your specific needs and preferences.
Regular maintenance and thoughtful placement of your colony box will go a long way in ensuring a thriving hive. Keep an eye on seasonal changes and adapt your care practices accordingly to support your bees year-round. With dedication and the right approach, you'll foster a healthy bee colony that contributes to both your local ecosystem and your honey production goals.
Frequently Asked Questions
What is a bee colony box, and why is it important?
A bee colony box is a structure designed to house a bee colony, providing shelter and space for essential activities like storing honey and raising brood. It's crucial for beekeeping as it influences the health and productivity of the hive, making it vital for both beginners and experienced beekeepers.
What types of bee colony boxes are there?
The main types of bee colony boxes include Langstroth hives, Top Bar hives, and Warre hives. Each type caters to different beekeeping methods and preferences, allowing beekeepers to choose one that best suits their needs and goals.
What materials do I need for a bee colony box?
Essential materials for setting up a bee colony box include the box itself, frames, foundation sheets, an entrance reducer, a queen excluder, a hive tool, a smoker, and a bee brush. Optional materials may enhance features and include a bee feeder, hive stand, or thermal insulation.
What tools are necessary for assembling and maintaining a bee colony box?
For assembly, you'll need tools like a screwdriver, drill, wood glue, measuring tape, hacksaw, sandpaper, and clamps. For maintenance, essential tools include a hive tool, smoker, bee brush, and protective gear, all contributing to the hive's health and productivity.
How do I assemble a bee colony box?
Start by gathering materials and reviewing assembly instructions. Construct the box, add frames and foundation sheets, and install the entrance reducer. Each step ensures a sturdy setup that promotes the health and efficiency of your bee colony.
What should I consider when setting up my bee colony box?
Choose an appropriate location with ample sun exposure, protection from wind, and near water and flowering plants. Position the box on a sturdy stand, facing south or east, and ensure it's angled for rain runoff for optimal conditions.
How often should I inspect my bee colony box?
Regular inspections should be conducted every 7 to 14 days to check for a healthy queen, monitor food storage levels, and inspect for pests. This routine helps maintain hive health and productivity, ensuring the well-being of your bees.
What should I do if my bees are not thriving?
If your bees are not thriving, check for adequate ventilation, food stores, and external conditions. Confirm the queen's health, and consider replacing her if necessary. Assess the colony's population and forage sources to improve honey production.
Ready to Build a Buzz?
Whether you’re just getting started or looking to upgrade your current hive setup, choosing the right bee colony box is the foundation of a thriving beekeeping journey. Dive into the adventure with confidence—gather your materials, pick your hive style, and give your bees the best home possible.Shop quality bee colony boxes and supplies today and start building a healthier, happier hive!